When it comes to inkjet printing issues, one of the most common issues our customers encounter is a clogged printhead nozzle. A clog can interrupt the flow of ink, affecting print quality and efficiency. Here’s a quick guide from our tech team on how to clean a clog from the printhead by purging the ink.
 Step 1: Identify the Clog
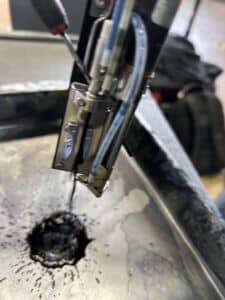
You can usually spot a clog by observing the ink stream. Dust or fine debris can block the nozzle or filter, causing the stream to deviate from the gutter or preventing ink from flowing altogether. With the hydraulic controls and ink turned on, check if the stream is off-course or not exiting the nozzle. Another way to detect a clog is by monitoring the pressure tank diaphragm cycle through the ‘info’ tab. If it takes longer than 7 seconds to complete its cycle, this could indicate a blockage in the system.
Step 2: Prepare for Cleaning
To clear the clog, start by turning off the ‘control’ in the hydraulic tab, then switch off the ink in the ‘printhead’ tab. This will stop ink flow so you can safely work on the printhead.
 Step 3: Access the Printhead
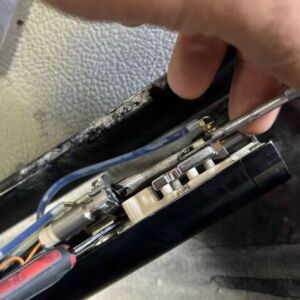
Using a Torx T-8 Allen key, remove the inner cover of the printhead. Use this tool to prop up the oscillator for easier access. Next, use a nozzle key (SK6) to remove the retaining plate and nozzle plate, placing them in a safe container. Let these parts soak in solvent while you proceed.
Step 4: Purge the Ink
With the hydraulic controls still off, briefly activate the ‘ink on’ button for 1-2 seconds. This will push ink through the printhead and help clear out any dust or debris.
 Step 5: Clean the Nozzle and Retaining Plate
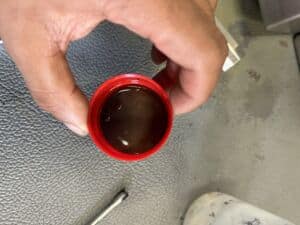
After purging the ink, ensure the middle-sized O-ring is still in place inside the oscillator compartment. Next, clean the nozzle and retaining plate by using a small cleaning bottle filled with the correct solvent for your printer. Squirt solvent behind the nozzle and retaining plate to ensure they’re free of any clogs.
Step 6: Reassemble the Printhead
Once the nozzle and retaining plate are clean, reinstall them using the nozzle key. Replace the inner cover with the Torx T-8 Allen key.
Step 7: Verify the Fix
Turn the ink back on in the ‘printhead’ tab and then switch the ‘control’ back on from the ‘hydraulic’ tab. Check the diaphragm cycle in the ‘info’ tab to make sure it’s running within the proper 7-second interval. Open the gutter and observe the ink stream—if it’s flowing correctly into the gutter, the clog has been successfully cleared.
 Step 8: Run a Test Print
Once the stream is back to normal, place the printhead cover on and run a test print. If everything looks good, return the printer to the production line.
By following these steps, you can quickly resolve clogs in your printhead and get back to smooth, uninterrupted printing. If you need further assistance, don’t hesitate to reach out to us! We are always here to help!
